
I've taken photography up a notch as a passtime. It's not that I've gotten better at it, or that I'm going professional. I would like to get a DSLR camera and sophisticated gear (last Sunday we were joking about polarizers making you popular), but that would take a lot of money and I'd feel bound to turn photography into a job of some sort to compensate. I have no intention of doing that, since turning anything into a job kills the fun, for me at least. (That's besides the fact that I have other uses in mind for that money.) But I've learned some tricks, both in the field and once the pictures are already in the computer.
I wrote a post about digital photo manipulation some time ago. It concerned border enhancement (especially for buildings) through a process of detecting borders and overlaying them on the original image. Simple and powerful, if done subtly.
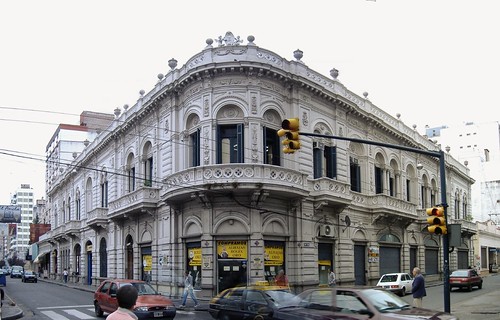
That was one of the first steps of the ongoing process of turning a careless point-and-shoot photographer into a semi-literate photo art producer. Again, I'm not turning into one of those self-overrated photographers who excrete string after string of "conceptual art" pictures who are just blobs of colour, or superb black-and-white renditions of garbage and old people's wrinkled faces. I just want my pictures to look nice (I was going to write "stunning", but that would be an exaggeration, and it most surely is a cliché).
Since these posts may sometime turn into a chronicle, and right now this could help someone, I want to document another step.
One of the things I didn't notice at some point (and I do now) is that the human eye can distinguish a lot more degrees of lighting than the camera can capture. Where you see a dark object inside a darker area within a pool of even darker shadows, the camera just sees a black mass. The subtle gradations of a bright cloud look pure white to the lens. Same for colour hues. This can't be helped except by technology and time. The lesson is that you should try to take advantage of all the capacity of your camera, and maximize the contrast — this, unless you're intentionally trying to produce a dull or blurry picture, of course. The image will only have 256 degrees of luminosity per colour channel (red, green, blue), which will give you only 256 degrees of value. You want to stretch those as much as possible.
Check out the tutorial on removing haze from gimpguru.org. This really blew my mind. It's a very easy process that can turn a picture alive.
The idea is simple. First, you don't have luminosity levels to spare, so if there are some dark pixels who look dark enough to you, and there's nothing darker than them in the rest of the picture, just call them black, make them really black, and drag the brighter colours along, making them proportionately darker. Then do the same to bright pixels: just make the brightest of them white, and make the rest brighter. The way you do this, in techspeak, is by clipping both ends of the value histogram of the picture, ignoring the extreme values with smaller frequencies.
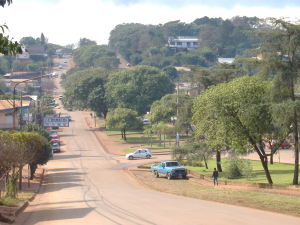
If the picture includes a bright sky, the white end of the histogram will be taken up by it. Therefore, the contrast enhancement must exclude the sky and other very bright areas. Here's a before-and-after sample, a view of Avenida Sarmiento in Oberá, Misiones. The problem was partly real haze produced by humidity in the air, and partly also "digital haze" produced by sunlight.
 before | 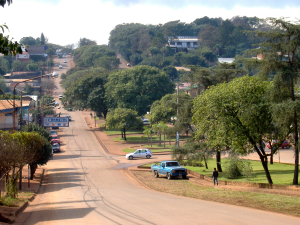 after |
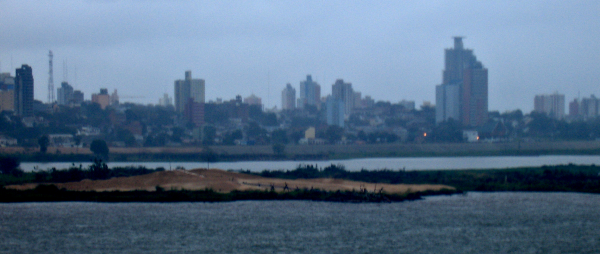
You can even improve some pictures that look unsalvageable at first. This is Posadas, viewed across the Paraná on the bus returning from Encarnación, at the highest zoom level, on a rainy day:
 before |
 after |
There's more of this kind of stuff where that came from, so stay tuned.


No comments:
Post a Comment
Note: Only a member of this blog may post a comment.